Setting Up NUnit & Writing Your First Automated Test
You've just learned what test frameworks are and why they're so essential for structured automated testing. That's a fantastic step! Now, the moment you've been waiting for: it's time to stop just talking about test frameworks and actually get one up and running. 🚀
In this lesson, we're going to take NUnit, our chosen test framework for this course, set it up in a fresh project, write some extremely simple C# code, and then write our very first automated test to check that code. You'll see firsthand how NUnit discovers your tests, runs them, and tells you if they pass or fail.
This is where the theory meets practice. Let's build something!

Why NUnit – A Quick Refresher
As we touched on in the last lesson, NUnit is a very popular, open-source, and feature-rich test framework for .NET applications. It's been around for a long time, has a strong community, excellent documentation, and a wide array of features that make it suitable for everything from simple unit tests to complex integration and even UI tests (when combined with tools like Selenium).
We're choosing NUnit for this course because it's a great platform for learning testing concepts that are widely applicable. Many of the principles and attribute styles you'll see in NUnit are similar to those in other xUnit-style frameworks like MSTest or xUnit.net, so the skills are transferable.
Think of NUnit as our reliable and versatile assistant that will help us write, organize, and execute our C# tests effectively.
Setting the Stage – Your C# Project
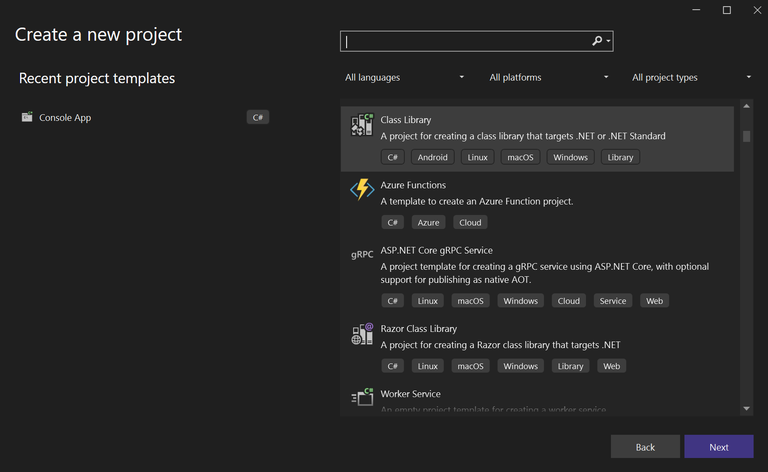
Before we can add NUnit, we need a C# project to add it to. For writing tests, especially unit tests or simple integration tests that don't require a full application to be running, a Class Library project is often the perfect choice. A class library compiles into a .dll file (a Dynamic Link Library), which test runners can then load to find and execute tests.
Here's how you can create one:
Using Visual Studio
- Open Visual Studio.
- Choose "Create a new project".

- In the "Create a new project" dialog, search for or select "Class Library". Make sure it's the one for C# and modern .NET. Avoid older ".NET Framework" versions for new projects if possible.
- Click "Next".
- Give your project a name. Since this will contain our NUnit tests, something like
MyFirstNUnitTestsorAutomationPractice.Testswould be good. Choose a location for your project. - Click "Next" or "Create" (depending on the Visual Studio version) and select your target .NET framework (e.g., .NET 8.0 or the latest LTS).
Visual Studio will create a new project, often with a default Class1.cs file. You can rename this file or delete it and add your own later.
Using the .NET CLI (Command Line Interface)
If you prefer the command line:
- Open your terminal or command prompt.
- Navigate to the directory where you want to create your project.
- Run the command:
(Replacedotnet new classlib -n MyFirstNUnitTestsMyFirstNUnitTestswith your desired project name). - This will create a new class library project in a folder with that name. You can then navigate into it:
cd MyFirstNUnitTests
Now you have an empty C# class library project, ready for some NUnit goodness!
Inviting NUnit to the Party
As we learned in our NuGet lesson, NUnit and its supporting tools are added to your C# project as NuGet packages. To get our tests up and running, we need to install a few key packages.
These are the essential ones for NUnit testing:
NUnit: This is the core NUnit framework library. It contains all the attributes (like[TestFixture],[Test]) and assertion methods (likeAssert.AreEqual()) that you'll use to write your tests.NUnit3TestAdapter: This package is crucial! It acts as a bridge or an "adapter" that allows test runners, like the one built into Visual Studio (Test Explorer) or thedotnet testcommand, to discover and execute tests written using the NUnit framework. Without this, your NUnit tests might not be found or run correctly by these tools.Microsoft.NET.Test.Sdk: This package provides the necessary infrastructure and common APIs for test projects to work with the .NET test platform. It helps integrate various test frameworks (like NUnit, xUnit, MSTest) with test execution tools.
Installing Packages via Visual Studio NuGet UI:
- In Visual Studio, right-click on your project in the Solution Explorer.
- Select "Manage NuGet Packages..."
- Go to the "Browse" tab.
- Search for "NUnit". Find the main
NUnitpackage (by NUnit Project) and click "Install". Choose the latest stable version.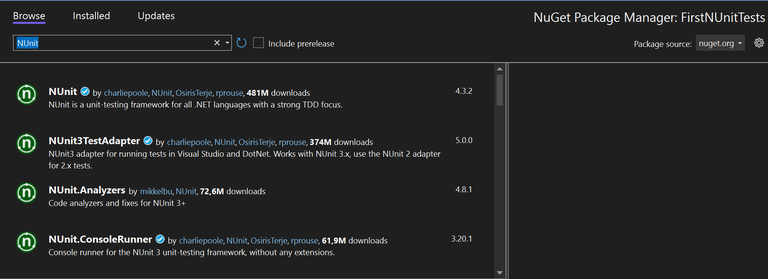
- Search for "NUnit3TestAdapter". Find it (by NUnit Project) and click "Install".
- Search for "Microsoft.NET.Test.Sdk". Find it (by Microsoft) and click "Install".
Installing Packages via .NET CLI:
If you're using the command line, navigate to your project's root directory (where the .csproj file is) and run these commands:
dotnet add package NUnit
dotnet add package NUnit3TestAdapter
dotnet add package Microsoft.NET.Test.Sdk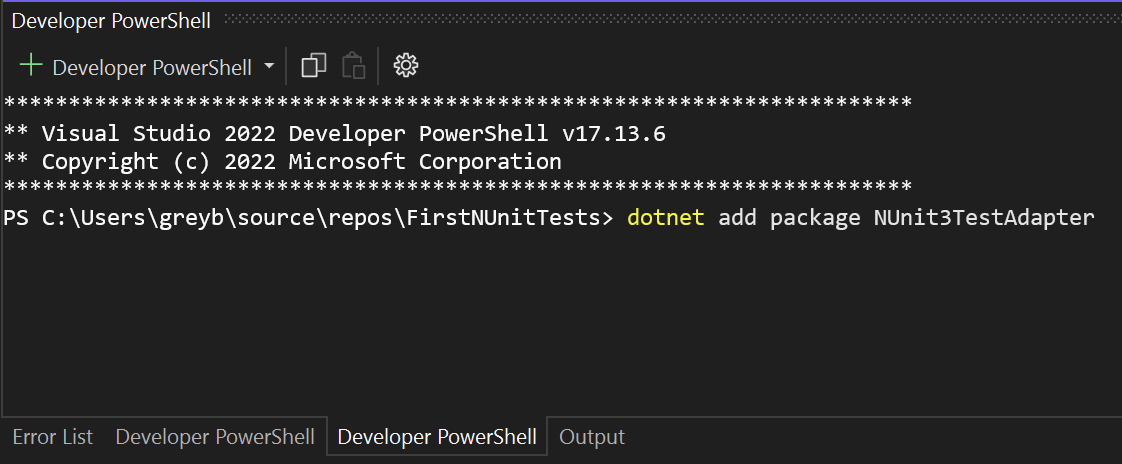
After these packages are installed, your project's .csproj file will be updated to include references to them:
<Project Sdk="Microsoft.NET.Sdk">

    <PropertyGroup>
        <TargetFramework>net9.0</TargetFramework>
        <ImplicitUsings>enable</ImplicitUsings>
        <Nullable>enable</Nullable>
    </PropertyGroup>

    <ItemGroup>
        <PackageReference Include="Microsoft.NET.Test.Sdk" Version="17.14.1" />
        <PackageReference Include="NUnit" Version="4.3.2" />
        <PackageReference Include="NUnit3TestAdapter" Version="5.0.0" />
    </ItemGroup>

</Project>
You're now ready to write NUnit tests!
System Under Test – What Are We Testing?
Before we can write a test, we need some code to test! For our first example, let's create an incredibly simple C# class. In a real project, this would be part of your application's codebase. For now, we can just add it to our test project for simplicity (though ideally, application code and test code live in separate projects).
Create a new C# file in your project (e.g., right-click the project, Add > Class...) and name it PoliteCalculator.cs. Add the following code:
namespace MyFirstNUnitTests // Use the same namespace as your project, or a sub-namespace
{
    public class PoliteCalculator
    {
        public int Add(int a, int b)
        {
            return a + b;
        }

        public string GetGreeting(string name)
        {
            if (string.IsNullOrWhiteSpace(name))
            {
                return "Hello, Guest!";
            }
            return $"Hello, {name}!";
        }
    }
}
Our PoliteCalculator class has two simple methods: Add which adds two integers, and GetGreeting which returns a personalized greeting or a guest greeting. This is our "System Under Test" (SUT) for this lesson.
Normally, a calculator should just crunch numbers – addition, subtraction, maybe some fancy exponentiation. But we're gonna throw in a greeting too. Is it logical? Not really. We're also breaking the Single Responsibility Principle like it's made of glass. But hey, it's all for the sake of learning!
In an ideal world, every software project would be perfectly structured, neatly following design principles with clear responsibilities and zero compromises. But reality? Rarely that clean. Deadlines, stakeholder demands, evolving requirements, and real-world constraints often force developers to bend best practices to make things work.
So, in this lesson, our PoliteCalculator represents that messy reality – doing more than it technically should. Instead of just crunching numbers, it's also welcoming users with open arms. It might not be ideal, but it gets the job done while helping us explore method organization, code structure, and unit testing in a fun, unconventional way. So let's roll with it and build the friendliest calculator ever! 😄🚀
Writing Your First NUnit Test
Now for the exciting part! Let's write some NUnit tests to verify our System Under Test. Create another new C# class file in your project, perhaps named CalculatorTests.cs. This is where our test methods will live.
using NUnit.Framework;
using MyFirstNUnitTests;

namespace MyFirstNUnitTests.Tests // It's good practice to put tests in a sub-namespace
{
    [TestFixture] // This attribute marks the class as a container for NUnit tests
    public class CalculatorTests
    {
        private PoliteCalculator _calculator; // Field to hold our PoliteCalculator instance

        [SetUp] // This attribute marks a method to run BEFORE EACH test method in this fixture
        public void Setup()
        {
            // Arrange common setup here
            _calculator = new PoliteCalculator();
            Console.WriteLine("Setup method called: PoliteCalculator instance created.");
        }

        [Test] // This attribute marks this method as an NUnit test case
        public void Add_TwoPositiveNumbers_ShouldReturnCorrectSum()
        {
            // Arrange: Specific inputs for this test (calculator instance is already created in Setup)
            int number1 = 5;
            int number2 = 10;
            int expectedSum = 15;
            Console.WriteLine($"Test: Add_TwoPositiveNumbers - Input: {number1}, {number2}");

            // Act: Perform the action we want to test
            int actualSum = _calculator.Add(number1, number2);
            Console.WriteLine($"Test: Add_TwoPositiveNumbers - Actual Sum: {actualSum}");

            // Assert: Verify the outcome
            Assert.That(expectedSum, Is.EqualTo(actualSum), "The sum of two positive numbers was not calculated correctly.");
        }

        [Test]
        public void GetGreeting_WithName_ShouldReturnPersonalizedGreeting()
        {
            // Arrange
            string name = "Wanderer";
            string expectedGreeting = "Hello, Wanderer!";
            Console.WriteLine($"Test: GetGreeting_WithName - Input Name: {name}");

            // Act
            string actualGreeting = _calculator.GetGreeting(name);
            Console.WriteLine($"Test: GetGreeting_WithName - Actual Greeting: {actualGreeting}");

            // Assert
            Assert.That(expectedGreeting, Is.EqualTo(actualGreeting), "Personalized greeting was incorrect.");
        }

        [Test]
        public void GetGreeting_NullName_ShouldReturnGuestGreeting()
        {
            // Arrange
            string? name = null; // Using nullable string for clarity
            string expectedGreeting = "Hello, Guest!";
            Console.WriteLine("Test: GetGreeting_NullName - Input Name: null");

            // Act
            string actualGreeting = _calculator.GetGreeting(name);
            Console.WriteLine($"Test: GetGreeting_NullName - Actual Greeting: {actualGreeting}");

            // Assert
            Assert.That(expectedGreeting, Is.EqualTo(actualGreeting), "Guest greeting for null name was incorrect.");
        }

        [TearDown] // This attribute marks a method to run AFTER EACH test method in this fixture
        public void TearDown()
        {
            // Clean up resources here if needed (e.g., _calculator = null;)
            // For this simple example, not strictly necessary but good to show.
            Console.WriteLine("TearDown method called.");
            Console.WriteLine("-----------------------------------"); // Separator for test output
        }
    }
}
Let's break down this test class:
using NUnit.Framework;: This is essential. It imports the NUnit library so you can use its attributes like[TestFixture],[Test], and theAssertclass. You might also need ausingstatement for the namespace where yourPoliteCalculatorclass resides if it's different.using MyFirstNUnitTests;: Add this if PoliteCalculator.cs is in a different namespace but same project, or if PoliteCalculator.cs is in the root namespace of the project.[TestFixture]attribute: Applied to theCalculatorTestsclass. This tells NUnit that this class contains test methods (test cases).[SetUp]attribute (Setup()method): Methods marked with[SetUp]are run before each individual test method within the fixture. It's perfect for common initialization code that each test needs, like creating an instance of the class you're testing (_calculator = new PoliteCalculator();).[Test]attribute: Applied to methods likeAdd_TwoPositiveNumbers_ShouldReturnCorrectSum(). This tells NUnit that this specific method is an executable test case. Test methods are typicallypublicand have avoidreturn type.- Arrange-Act-Assert (AAA) Pattern: Notice how each test method is structured:
- Arrange: Set up the specific inputs and expected outputs for this test.
- Act: Call the method of your
PoliteCalculatorclass that you want to test. - Assert: Use methods from NUnit's
Assertclass to check if the actual result from the "Act" phase matches your expected result. If any assertion fails, the test method fails.
[TearDown]attribute (TearDown()method): Methods marked with[TearDown]are run after each individual test method. This is used for cleanup tasks, like disposing of objects or resetting states.
The Arrange-Act-Assert (AAA) pattern is a highly recommended convention for writing tests because it makes them clear, readable, and easy to understand what each test is doing.
Running Your Tests & Seeing Results
Now for the payoff! Let's run our tests.
Running Tests in Visual Studio:
- Build Your Project: First, make sure your project compiles successfully (Build > Build Solution or Ctrl+Shift+B).
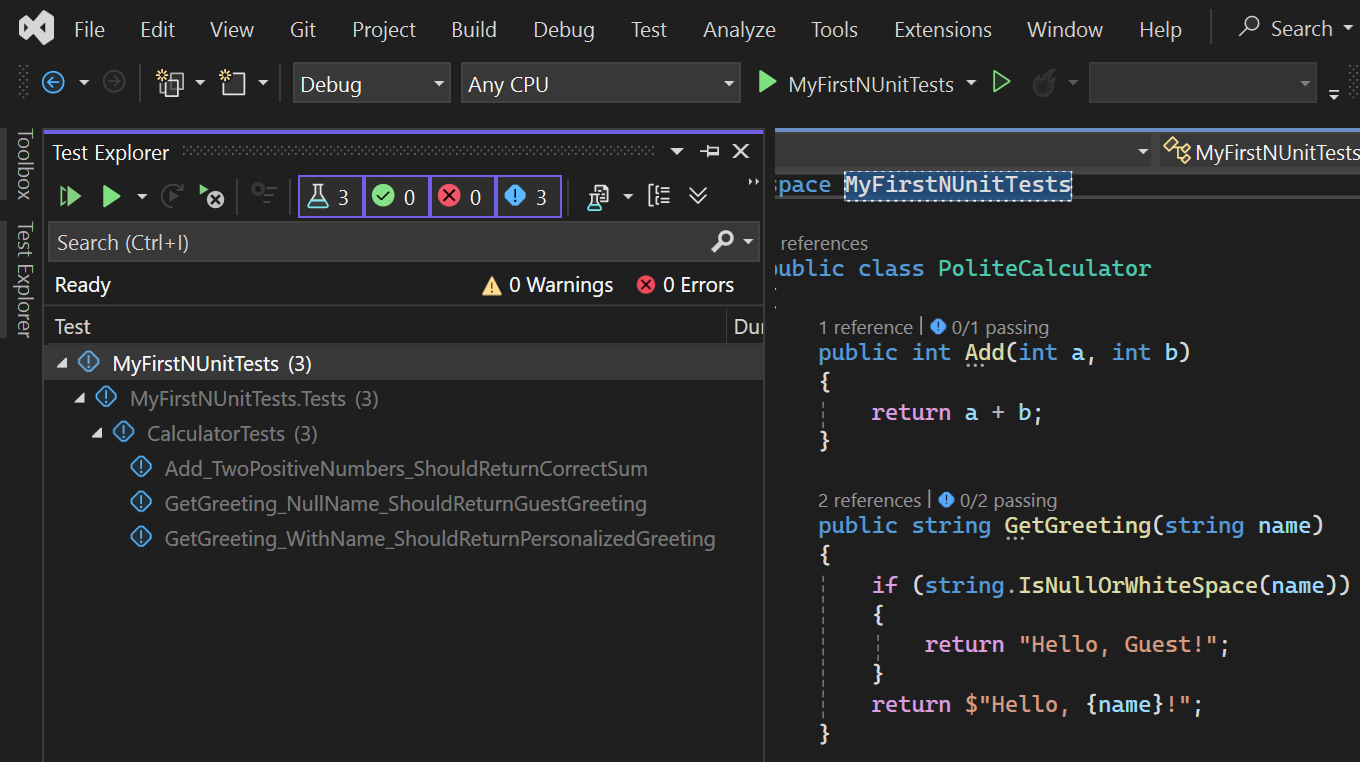
- Open Test Explorer: If it's not already open, go to Test > Test Explorer in the Visual Studio menu.
- Discover Tests: After a successful build, your tests (
Add_TwoPositiveNumbers_ShouldReturnCorrectSum, etc.) should appear in the Test Explorer window, often grouped by class. - Run Tests:
- You can click the "Run All Tests" button (often looks like a play icon or two play icons) in the Test Explorer.
- You can right-click on a specific test method, test fixture (class), or namespace in the Test Explorer and select "Run".
- View Results:
- Passing tests will usually show a green ✅.
- Failing tests will show a red ❌.
- The Test Explorer will also show a summary (how many passed/failed) and provide details for any failing tests, including the assertion message and a stack trace.
Running Tests with the .NET CLI:
- Open your terminal or command prompt.
- Navigate to the root directory of your test project (the folder containing the
MyFirstNUnitTests.csprojfile). - Run the command:
dotnet test - The .NET CLI will build your project, discover the NUnit tests, run them, and then print a summary of the results to the console, including which tests passed or failed and any error messages for failures.
Tests Not Showing Up or Not Running?
If your tests don't appear in Visual Studio's Test Explorer or if dotnet test reports "No tests found," double-check these common culprits:
- Ensure you've installed all three required NuGet packages:
NUnit,NUnit3TestAdapter, andMicrosoft.NET.Test.Sdk. The Test Adapter is key for discovery! - Make sure your test class is marked with the
[TestFixture]attribute and declared aspublic. - Verify that your individual test methods are marked with the
[Test]attribute. - Ensure your test methods are declared as
public void. - Rebuild your solution/project (sometimes Visual Studio needs a nudge).
- Check the "Output" window in Visual Studio (specifically the "Tests" output) for any error messages during test discovery.
That moment when you run your tests and see those green checkmarks is incredibly satisfying! ✅ It means your code (and your test!) is behaving exactly as you intended. If you see red, don't worry – that's also valuable feedback telling you where to look for problems.
Key Takeaways
- NUnit is a popular test framework used to write, organize, and execute automated tests for .NET applications.
- To use NUnit, you add necessary NuGet packages to your C# project, primarily
NUnit,NUnit3TestAdapter, andMicrosoft.NET.Test.Sdk. - NUnit uses attributes like
[TestFixture](to mark a class containing tests) and[Test](to mark a specific method as a test case). - The Arrange-Act-Assert (AAA) pattern is a best practice for structuring your test methods, making them clear and maintainable.
- NUnit's
Assertclass is used within test methods to verify that actual outcomes match expected outcomes, which determines if a test passes or fails. - You can run your NUnit tests easily using Visual Studio's Test Explorer or from the command line with
dotnet test.